Red Moonrise Red Moonrise


Friday, October 03, 2014

Decorated Cookies Inspired by Kerala

I love traveling and all the new sights, sounds and experiences it brings. But I've come to realise that travel has something more to offer: design ideas! So here's what a recent trip to Kerala has led to:

Kerala Inspired Decorated Cookies

The idea for this set took root in Kerala itself, while I worked on our Onam pookalam. I started thinking of how a pookalam would be such a great thing to cookie-fy: just let your imagination loose with the designs of your choice! Then I considered other Kerala icons. Coconut trees were a given, because I have a cutter :D  I didn't want to go the Kathakali route as honestly, I find the green face-black eye combo a bit freaky! Kris really wanted me to make elephant cookies, especially because of her nettipattam fascination, but without a cutter I found it a bit tricky to pull off. Then it struck me, simple and sweet - a kasavu print!

Kasavu sari print cookies

This Onam was my first time wearing a kasavu sari, beautifully draped thanks to my dear sister-in-law's expertise. The basic kasavu look is a golden border (of varying thickness) against white or cream. That is what I've tried to replicate in this cookie, and it's incredibly simple to do. Just cover the cookie in white royal icing and let it dry completely, for about 6-8 hours. Then mix some edible gold dust with clear vanilla extract / lemon juice to get a paint consistency and use a square brush going from one side to the next. Then of course, you can get more adventurous, like the kasavu saris I saw when I went shopping this time, with intricate embroidery and even some north-south fusion happening!

Next, I got started on the coconut trees.The trickiest bit of course, is the leaves. You could pipe them on, and I did give that a shot. Not fun. Much easier, and also way more fun, is to do them using a technique called wet on wet icing, where you fill in a base colour and then immediately pipe other colours on top of it, so that the new icing sinks into the base icing. You can then manipulate the colours to create swirls or shading effects.

Coconut tree cookie tutorial

You'll need royal icing in:
- Brown, filling consistency
- Dark green, piping and filling consistencies
- Light green, filling consistency
- Yellow, filling consistency
- Orange, filling consistency (only if you want to add coconuts)

1. I started off filling in the trunks with brown icing and letting them dry, at least 2-4 hours. Then, working with one cookie at a time, outline the leaf part with dark green piping icing and fill in with the fill consistency.

2. Immediately pipe a line of light green icing starting from the center and moving out to the tip of each leaf.

3. Follow with the yellow on top of the light green, and you can be a bit random with this, as the yellow doesn't need to be uniform; I just found that the odd bit of yellow here and there made it pop a bit.

4. Now the fun part! Use a toothpick, or other pointy tool and drag it through the icing in sideways swirls from the top of the line to the tip of the leaf. Clean the pick on kitchen paper and then drag it through the center of the leaf from top to bottom.

5. Finish all the leaves in the same way. You can go back and do some more swirls if the icing needs to be spread better. Allow to dry till set 6-8 hours.

6. Add coconuts with the orange icing. If you want to be more realistic, use orange piping icing to add those funny bead-like thingies, like in the last tree. I asked hubby if he knew what they were, and apparently that's like the flower of the tree, can you believe it?! Use a brown food marker, or food paint and add random lines across the trunks if you want.

And now, best for last, my pookalam cookies!

Making pookalam cookies

I used some of my smaller flower and circle cutters to trace the outlines on the cookies with food markers, and freehanded the details in. Normally, cookies are decorated as described above for the trees: outline with a thicker icing and fill in with a looser one to get a smooth finish. But since a real pookalam is made with flower petals, it has a textured look. The easiest way of recreating that effect I felt was to use one thick icing to fill each section. Give it about 5 minutes to set, and then using a fondant tool (pictured) or a toothpick, start poking at the icing and disturb the surface to get that texture. It's important to use thick icing and give it those few minutes to begin to harden, as looser icing will just merge back and won't retain the texture. Then just leave it 4-6 hours to set completely.

Pookalam Cookies

Here's my complete set of pookalam cookies. I stuck to colours that are typically used and the designs can be anything you like. This is the sort of decorating I enjoy the most, where you can play around with several colours and patterns.

Kerala inspired Cookies

So if you love decorating as well, keep those eyes peeled the next time you take a trip; along with souvenirs, you just might find some brilliant inspiration too!


Blogger Tricks

Monday, September 15, 2014

Elephants & Butterflies: Our Onam Recap

Onam pookalam at Cochin Airport

I love celebrations and parties, and all the work that goes into making them successful. It can get a bit stressful at times, but it is also bunches of fun. These days, I find myself enjoying the process more because Kris is allowed to be more involved. Though it is sometimes irritating when your child wants to "help", on the whole, I love it when Kris participates. Viewing the world through her eyes is both entertaining and enlightening. She brings in ideas and opinions that never cease to amuse and amaze. So I'm incredibly grateful to God for the past few weeks and all the experiences we've had.

Exactly six years ago, I blogged about my first Onam in Kerala. How time flies, and how it changes! This Onam was not only the first we've celebrated since Kris was born, we were also back in Kerala for another all-out celebration with my in-laws.


The day before Onam, we visited a nearby temple to view some of the festivities. It also happened to be a beautiful, moonlit evening. In addition to the visual treat, there is also traditional music that is played. Kris was initially overwhelmed, as it is unlike anything she's seen (or heard!) before.


She was most keen on seeing the elephants, but once there, she didn't want to get too close to them. So we watched the mahouts standing on the backs of the elephants and go through elaborate rituals of displaying and changing the umbrellas they're holding. A new word we both learned from my husband is "nettipattam" - the golden headdress all the elephants are wearing. She's now so fascinated with them, she wanted to buy a nettipattam when we spotted one at an airport shop!

Making a butterfly pookalam

Here we are on Onam morning, making the pookalam (floral floor decoration) at the entrance to our home. This was one of the things I was most excited about sharing with Kris. I had showed her pictures of different pookalam patterns before we left for Kerala so she'd have some idea of what it involved. I left the choice of design up to her, and she decided on a butterfly. A very apt choice for my in-laws home, as my mother-in-law runs a beauty parlour called Butterflies :)

Butterfly pookalam

This time, it was just my husband, Kris & myself who worked on the pookalam, as the rest of the family were getting ready to gather at my sister-in-law's home, where the Onam sadya (banquet) was to be held. I think this was a great learning experience for Kris as you need considerable patience to complete a pookalam, right from plucking the petals to filling in the design and then tidying up.


The sadya is the traditional feast eaten on Onam and other important occasions in Kerala. It consists of a variety of pure vegetarian dishes served with rice. (Please excuse the poor quality, the pics were all hurriedly clicked on our phones). The most interesting feature of course, is that it's eaten off a banana leaf. It is also customary to sit cross-legged on the floor, but comfort and convenience came first for us, so we served the meal at the dining table :) When I was growing up, my mother and maternal grandmother always got together to prepare the usual Onam fare, and the big thrill for my sister and me was to eat from the banana leaf. So I'm really happy that Kris got a chance to experience this as well.

Then post-lunch came the photo session. Most of the photos were clicked around the pookalam my niece made. All the women had dressed up in Kerala's signature sari - white/cream with the traditional golden border called kasavu. For me, this was one of the best parts of our trip, getting all dressed up in Indian finery! Kris too loved her pavada, a blouse and full-length skirt. While her cousin sisters sported different colours, I got Kris a set in the typical Kerala kasavu style that she's now looking forward to taking to school. That's yet another thing I'm grateful for, that my daughter shares my love for dressing up! I'm signing off this post with a photo that my little girl took of me and her aunts (I'm on the left). Nope, I didn't crop too much off this; it was a headless shot to begin with, as in her words, she was trying to get the pookalam in the shot as well :)


Thursday, August 07, 2014

Wholewheat Ginger Cookies {Fuss-free Baking}

Ginger is one of my favourite flavours. The fragrance of a ginger-infused dough, both as it makes and bakes, is just intoxicating! You've got to have baked with it to know what I'm talking about, so read on and give this one a try.

Fuss-free Wholewheat Ginger Cookies

I stumbled across these Ginger Cookies a few years ago while searching for healthier treat options. Now most "healthy" treats may be good for you, but I'll be honest: they don't really hit that sweet spot. Not so these cookies. Made with oil, wholewheat flour and raw sugar (and ginger of course!), they are healthier than your regular cookies and also deliciously satisfying! I make most of these cookies plain, which is what my hubby and daughter take along in their snack boxes, and the ones with sprinkles are my daughter's back-from-school treat.

Wholewheat Ginger Cookies (adapted from eatingwell.com)

Yield: 3 dozen

2/3 cup canola oil
3/4 - 1 cup raw sugar (I used the whole 1 cup)
1 large egg
4 tbsp molasses OR treacle OR golden syrup (I use treacle as I prefer its taste over molasses)
2 cups sifted wholewheat flour (I use our Indian chapati flour)
2 tsp baking soda
1 1/4 tsp ground cinnamon
1 1/4 tsp ground ginger

1. Preheat oven to 180C and line 3 baking trays with parchment / baking paper.
2. Mix flour, soda, cinnamon and ginger together. Set aside.
3. Whisk oil and sugar in a large bowl till combined. Add the egg and whisk till mixed in, followed by the treacle and mix till all the wet ingredients are well combined.
4. Sift the dry ingredients over the wet and combine with a spatula till they are blended in.
5. Drop tablespoon-sized scoops of dough onto baking trays, spacing them a couple of inches apart. I put 12 on a tray.
6. Bake for 10-12 minutes till set, but still slightly soft when touched. Transfer to a wire rack to cool completely before storing in an airtight tin.

Notes:
- The original recipe involves rolling 1-inch sized balls of the dough and then dipping it into sugar. I just dip a few scoops of dough in sprinkles, and leave the rest plain, they still taste beautiful. Feel free to dip in sugar or sprinkles of your choice.
- Depending on your cookie preference, bake for 10 minutes for a softer cookie and for the full 12 minutes for a crunchier one.

Fuss-free Wholewheat Ginger Cookies

This recipe is a particular favourite of mine as it ticks all the right boxes: fuss-free, check; healthier, check; absolutely scrumptious, check! As there's no butter and therefore no heavy mixing required, my almost-five-year old could take a more active role and in fact, mixed all of the wet ingredients herself. It boosts her confidence in the kitchen and gives her that creative satisfaction. Ginger is not a universally loved flavour, so I'm delighted that my family shares my enthusiasm for it. Even my husband who dislikes most other cookies loves this one, so this recipe is an all-round winner!

Fuss-free Wholewheat Ginger Cookies

Friday, July 18, 2014

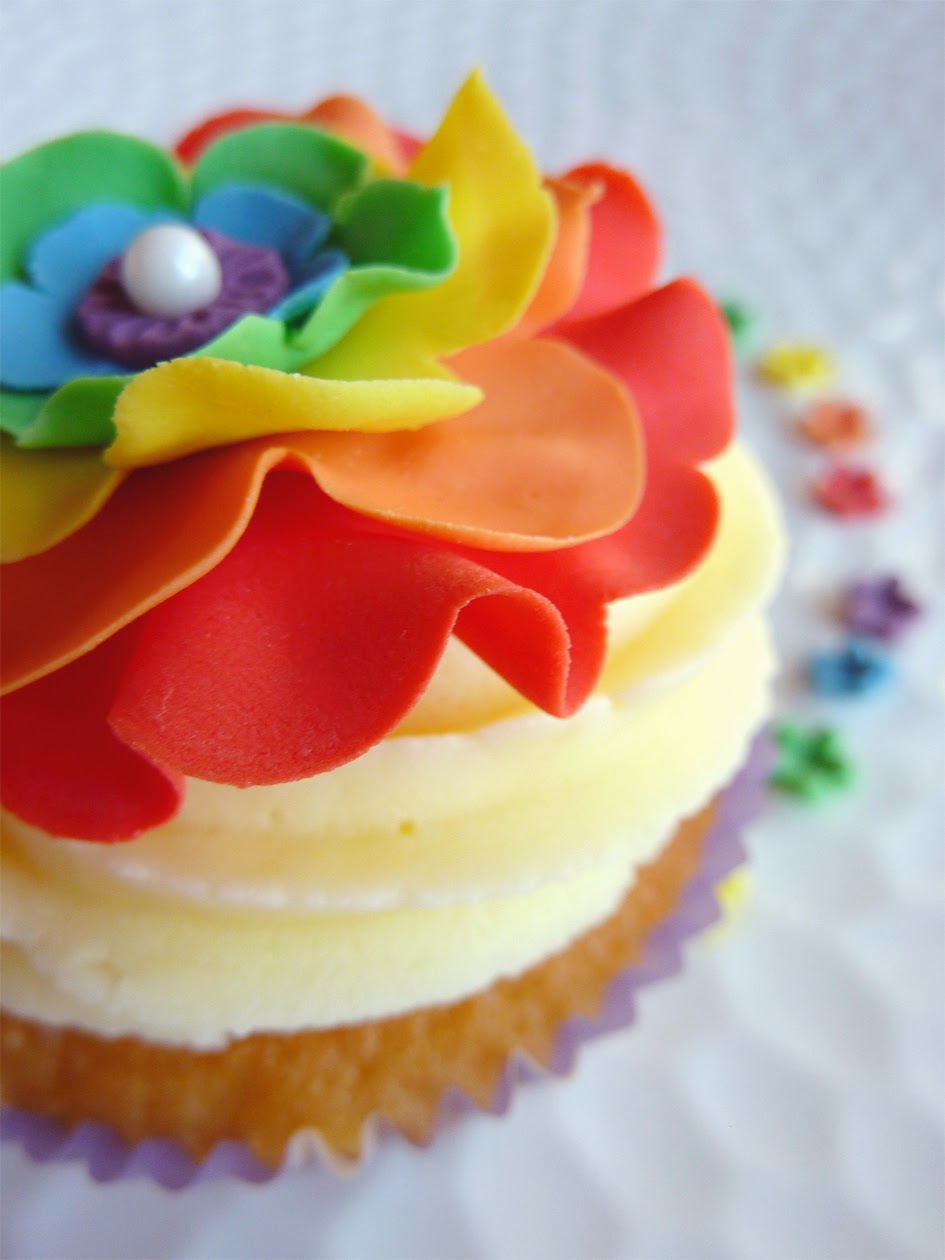
Rainbow Ruffled Fondant Flower Tutorial

My friends over at Pretty Paper Studio have a rainbow theme for this month's craft challenge (do check out their gorgeous work on their blog). Inspired by the colours, I wanted to play along too, though not with paper, but my preferred medium - fondant! I decided to combine rainbow colours with my current favourite decoration - ruffled fondant flowers.

Rainbow Ruffled Fondant Flower Tutorial

Before we get on with the tutorial, here are some of the things you'll need:

Supplies for Rainbow Ruffled Fondant Flowers

Fondant (or gumpaste or a mix of both) - in six colours.
Scalloped circle / flower cutters in various sizes.
Rolling pin.
Icing sugar (or cornstarch), for dusting.
Ball tool, for ruffling the edges of the flowers.
Foam pad.
Soft sponge pad.
Water and a paintbrush (reserved for decorating purposes only).
Kitchen paper.

My cutters come from various sets, as I don't have a single set for small flowers. The foam and sponge pads are Wilton's. Also, remember to keep your fondant wrapped tight in cling film when not in use.

And now the tutorial.

Building the Rainbow Ruffled Fondant Flower

1. Dust your work surface with some icing sugar and then roll out your red fondant till it's about 1 mm thick. Cut out the base layer of the flower with your largest cutter, and place it on the foam pad.

2. Hold the ball tool like a pencil with half the tip on the edge of the fondant and half on the pad, and roll back and forth with a gentle pressure; the fondant thins out and ruffles up. Don't overdo it as the fondant can rip.

Building the Rainbow Ruffled Fondant Flower

3. Gently lift your ruffled red fondant layer and place on the sponge pad. The flower will be assembled on this pad. Hold the ball tool upright and press down gently on the center to cup the layer.

4. Roll out the orange fondant and cut with the second-largest cutter. Ruffle the edges on the foam pad. Brush a tiny amount of water on the center of the red layer. Lift the orange layer, center it over the red layer and place it down. Press down gently with the ball tool so it adheres.

5. Roll tiny bits of kitchen paper into tubes and prop up any edges that are drooping too low. Once the fondant has had a couple of hours drying time, you can carefully ease the paper out and the fondant will stay raised.

Building the Rainbow Ruffled Fondant Flower

6. Repeat steps 3-5 for the yellow, green and blue fondant, making sure you use cutters of decreasing size. I rolled a small ball of purple fondant and adhered it to the blue layer with a dab of water.

7. You can leave it at this, or optionally press down a white pearl cachous in the center of the purple ball and add lines to the edge of the purple fondant by pressing down with a toothpick or a knife tool. Remember to place kitchen paper tubes wherever needed.

Gently transfer to a baking paper-lined tray, or leave it on the sponge pad to dry 4-6 hours before handling, and your rainbow ruffled fondant flower is ready!

Rainbow Ruffled Fondant Flower

As you can see, I used my flower to top off a freshly frosted cupcake. Just press down gently while the frosting is still soft. To adhere the flower to a fondant surface, I'd recommend using a dab of royal icing or sugar glue instead of plain water, to give it a stronger bond.

Hope you've enjoyed this tutorial!

Rainbow Ruffled Fondant Flower Cupcake

Monday, June 16, 2014

Anzac Biscuits {Fuss-free Baking}

Baking is one of my greatest pleasures, and for the most part, I've been fortunate to be able to indulge that passion with all the necessary equipment and gadgets it calls for. But that hasn't always been the case. I lived in London a few years ago, and while it was a great experience overall, it also required a few compromises, baking-wise. As our stay there hinged entirely on my husband's work, I was reluctant to make any pricey investments in baking equipment, knowing we could have to pack and leave any time.

That's when I began searching out recipes that were simpler and easy to put together, without the need for special mixing equipment. Even today, when I'm blessed with a better-equipped kitchen, there is a different kind of satisfaction when I find simple, easy-to-mix recipes that turn out well. And that is why I'm introducing a new series: Fuss-free Baking!

Maybe you're an occasional baker or someone just starting out, maybe you have certain constraints like I did. Or maybe you're just tired or rushed for time and want to whip up something quickly without dragging out the mixer. Recipes that are labelled Fuss-free Baking will be easily mixable by hand and have fewer ingredients. You will still need 1-2 baking trays and either a scale or measuring cup to measure ingredients, but at least the need for mixing equipment can be avoided.

Anzac Biscuits

I'm starting off with a biscuit recipe that I first heard of only after moving to Australia. ANZAC stands for Australian and New Zealand Army Corps. Wikipedia traces the origins of this biscuit back to World War I when it was a favourite of army wives to send for their husbands due to its long shelf life. After having made it in school recently, my daughter asked me to make some at home as she found them very yummy. Since it is a classic Aussie recipe, I turned to an Aussie culinary icon for guidance. Here it is:

Anzac Biscuit Recipe (adapted from Donna Hay)

Yield: approx 3 dozen biscuits.

2 cups (180g) rolled oats
1 cup (150g) plain (all-purpose) flour (I used 1/2 cup plain and 1/2 cup whole wheat flour)
⅔ cup (150g) caster (superfine) sugar
¾ cup (60g) desiccated coconut
⅓ cup (115g) golden syrup
125g unsalted butter
1 teaspoon bicarbonate of soda
2 tablespoons hot water 

1. Preheat oven to 160°C (325°F). Mix the oats, flour, sugar and coconut in a bowl. 
2. Cook the golden syrup and butter in a saucepan over low heat, stirring, until melted. 
3. Mix the bicarbonate of soda with the water and add to the butter mixture. It will fizz. Take off the heat and pour into the oat mixture and mix well to combine. 
4. Drop tablespoonfuls of the mixture onto baking trays lined with baking / parchment paper and flatten to 7cm rounds, allowing room to spread. 
5. Bake for 8–10 minutes or until deep golden. 
6. Allow to cool on baking trays for 5 minutes before transferring to wire racks to cool completely. The 5-minute rest time is essential as the biscuits will still be soft on coming out of the oven, and only firm up as they cool.

--------------------

Anzac Biscuits

The cooked butter and syrup give this biscuit a mild butterscotch flavour. You may also have noticed that Anzac biscuits are eggless; that is one of the reasons they keep so well. The baking time is up to you and what type of biscuit you prefer: you can see the difference in colour where one batch baked for 10 minutes leading to a darker, crunchier biscuit, and another I baked for just 8 minutes, making a chewier one. I personally prefer the crunchy ones that have a nice snap when you bite into them. I also love the way the oats stand out against the darker biscuits.

I hope I've given you enough reason to try making these biscuits. If you like something with a dash of chocolate, you can try these equally fuss-free chocolate chip cookies.

Sunday, May 11, 2014

Mothers & Daughters: Appreciating the Other Side

Kris's depiction of the two of us

This conversation took place a few weeks ago, while we were sitting in church waiting for Mass to begin.

Kris, in a serious whisper: "It's hard work being a mum, isn't it?"

My heart just filled up at this unexpected insight from my four-year-old. "Yes, it is." I whispered back to her, smiling mistily. We sat in a companionable silence for some time, till she turned to me and whispered just as seriously as before, "It's hard work being a daughter too."

Being in church, I had to subdue the laugh that bubbled up to a quiet chuckle. But as I sat there and thought about what she'd said, I had to agree, it's hard to be a daughter. Especially now that she has a basic level of understanding and thinks she knows all there is to know, it must be very hard to come up against the boundaries we set for her. Very hard to accept and act on our advice, when she thinks she knows best.

With all my attention focused on trying to be a good mum, and doing the things good mums should do, I don't think I'd ever really thought about our relationship from her perspective before. Smart remarks like that make me realise that my baby is a baby no longer, but very much her own person, with her own views and opinions that hubby & I need to take into account as we move ahead on this parenting journey. So I have to thank my little Kris for helping me to become more empathetic and open-minded as a mother.

On Friday, I received a wonderful bag of "surprises" that she'd made at school. It included a card, the drawing above of the two of us (did you see my green nail polish?!), a cloth bag with a similar picture painted on it, and a Mother's Day survey! It had questions on what I do, my likes and strengths, how we spend our time and so on. Her answers are both heartwarming and hilarious. They were written down by one of her teachers, and here I have to say, kudos to those ladies for getting 20 four-year-olds to answer a bunch of questions!

Highlights from the survey:

What does your Mum cook the best?
Answer: Mango curry and rice.
(Only, it's not Mum who used to make this, it's Dad! But Mum has learned how :D)

Why do you love your Mum?
Answer: Because she makes lovely cookies.
(So the way to her heart is also through her stomach!)

I love that the school has taken the effort of carrying out this little survey, as it has given us a beautiful memento of Kris at age four, how she sees me and what she values about us. It's rewarding to know that in addition to the "hard work", she sees us as having a loving and fun-filled relationship .... with food and baking being a big part of it, of course :)       

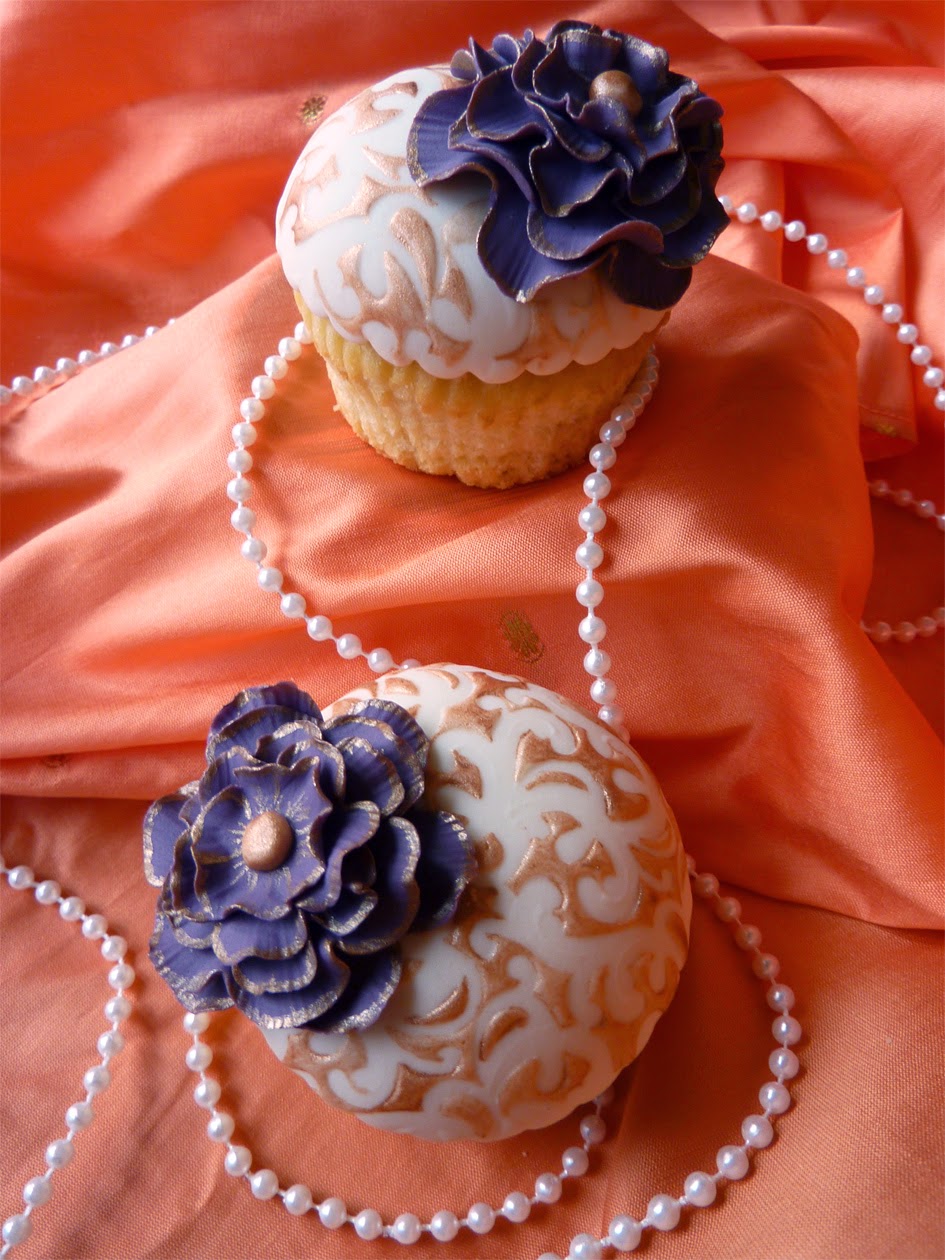
VVanilla cupcakes with textured fondant toppers and handmade ruffled flowers

Sunday, April 27, 2014

An Easter Education

"Is Easter the Easter bunny's birthday?" went the innocent question from my daughter Kris last year. Even as I laughed and pulled her in for a cuddle, I began wondering how I would tackle this. I grew up in a country where Easter was not a national celebration; it was significant only to the Christian community and we all knew that the central figure in the Easter story is Jesus (the bunny was way low-profile back then). Kris is growing up in an environment where all the major Christian festivals may be national holidays, but where Jesus is far removed from the mainstream celebrations and associated imagery. Santa becomes the star at Christmas, and Easter is the bunny's time in the limelight.

So it's quite understandable that Kris thought Easter revolved around the bunny. Of course I wanted to set her straight, but how do you explain death and resurrection to a three-year old and not leave her scared, or scarred? At the time, I simply told her that Easter was about Jesus, who was 'taken away' by the 'bad people', but that He managed to come back and save everybody, and that is why we celebrate Easter.

Placing marzipan crosses on the Hot Cross Bun Cookies
Kris putting the marzipan crosses on Hot Cross Bun Cookies

Don't get me wrong, I'm not against Santa or the bunny. I think they add a fun element to these celebrations and I happily share Kris's excitement in the Easter egg hunts and hat parades. We enjoy making Easter bonnets and bunny masks and as you can see here, we've been busy baking to share treats with our friends. But at the same time, I feel it's essential to remember what's really at the heart of this celebration, and more importantly, to take the time to help my child understand that too.

Easter sugar cookies and gift basket
Easter sugar cookies. Left: bunny-scape. Top right: Easter egg cookies. Bottom right: Easter gift basket.

Kris is now a year older, and wiser (sort of :D). Because of tv and her peers, she now has words like 'dead' and 'kill' in her vocabulary, which gave me room to be more specific about the Easter story this year. We've been going through her kiddy Bibles, reading the stories from them, and this has led to some memorable conversations. I will always cherish the priceless expressions that race across her face as she tries to absorb it all.

Our talks have also had another unexpected effect: in teaching Kris, I am learning afresh too. In searching for words to explain our faith in its simplest terms, I found myself reconnecting with it more profoundly than I ever have before. And it feels like I'm discovering the beauty of it all over again, which when you think about it, is exactly what this period should achieve.

Easter Sunday then dawned and we had a quiet morning at home. I was feeling rested and renewed. We video-chatted with my family and when my mother asked Kris why we were celebrating, she said it was because Jesus died and came back to save us.  I lit up with her answer .... and then deflated a moment later when she said, "but the bunny is the bigger part about Easter." {sigh}.

It's going to take quite a few Easters before she really gets it. I know it's a slow and lifelong process. Her questions haven't abated in the week since, and I'm encouraged that she wants to keep reading from her Bible, instead of me making her do it. Of all the things we do together, I especially treasure the time we've spent discussing Jesus over the past few weeks. I only hope I'm able to sustain her interest, and help her budding faith flourish. 
 
Piped royal icing filigree cross cake topper
An incredibly fragile royal icing filigree cross atop a simple vanilla cake with cream cheese frosting & toasted almonds.